How To Remove Mold From Crawl Space Yourself Effectively
Over time, mold can develop in crawl spaces especially during the wet months or if you don’t have a vapor barrier. When this happens, it poses a health hazard that needs to be addressed as soon as possible. But how?
How to remove mold from crawl space yourself:
- Assess the mold situation thoroughly
- Wearing appropriate personal protective equipment (PPE)
- Clean with a foaming spray
- Soak the affected area with a mold killer
- Scrub off the residue and dispose of everything,
- Control the cause of the mold growth
Ready to remove mold from crawl space yourself again? Read on for an elaborate process of removing mold from crawl space yourself.
How to remove mold from crawl space yourself
Mold has always been an issue for most people with unmaintained or wet crawl space. If somehow your crawl space got wet and now it is infected with mold, it;s crucial that you get rid of it as soon as possible. Mold has been associated with various health hazards and if you don’t fix the situation, it might spread to your house contaminating the indoor air quality. Assuming you want to remove the mold yourself, how do you do it effectively:
Step 1: Assess the Situation
When dealing with mold in a crawl space, it is crucial to assess the situation thoroughly. Begin by examining the extent of the mold growth. This involves visually inspecting the area and identifying any visible signs of mold, such as discoloration, fuzzy patches, or a musty odor. It’s important to note the size of the affected area and whether the mold has spread to other surfaces or materials.
In addition to evaluating the mold growth, it’s essential to investigate and address any underlying causes. Check for sources of moisture, such as water leaks, condensation, or high humidity levels, as these conditions create an environment conducive to mold growth. Identifying and resolving these issues is crucial to prevent future mold problems. By addressing the root cause, you can effectively eliminate the conditions that promote mold growth and ensure long-term mold prevention.
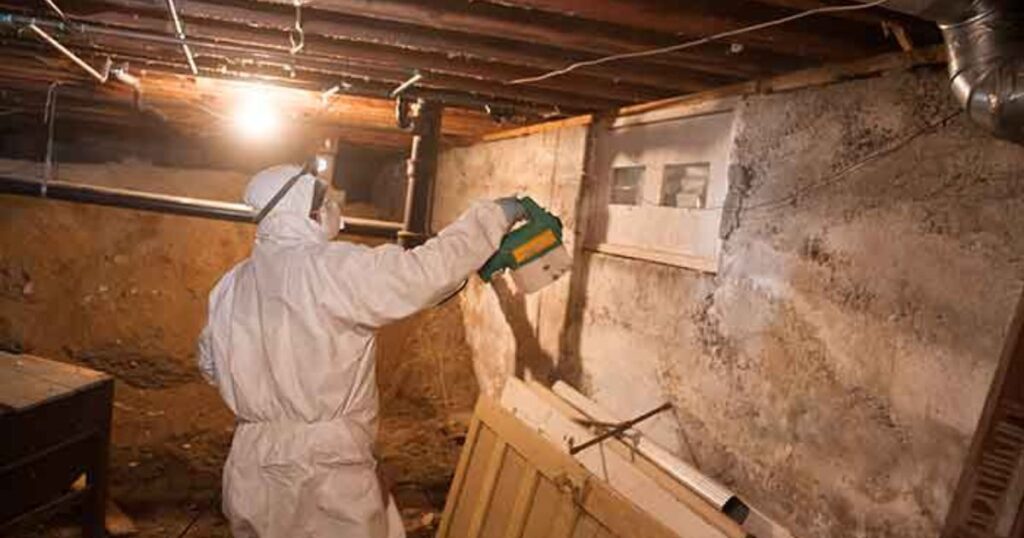
Step 2: Protect Yourself
When dealing with mold in a crawl space, it is vital to prioritize your health and safety. Mold spores can cause allergic reactions, respiratory issues, and other health problems, so it is essential to take proper precautions.
Wear appropriate personal protective equipment (PPE) to minimize exposure to mold spores. This includes wearing goggles or other eye protection to shield your eyes from airborne spores and particles. Gloves should be worn to protect your skin from direct contact with mold and cleaning agents. Additionally, wearing an N-95 mask or a respirator with a higher filtration rating can help filter out mold spores and prevent inhalation.
Proper ventilation is also crucial during mold remediation. Use fans or a dehumidifier to improve air circulation and reduce humidity. This helps minimize the spread of mold spores and promotes a healthier working environment.
Step 3: Clean with a Foaming Spray
To effectively clean a crawl space affected by mold, using a foaming spray can be an effective method. A foaming spray is specifically designed to target mold and mildew growth. It works by clinging to the surfaces and penetrating porous materials, such as wood or concrete, where mold may be present.
When using a foaming spray, carefully read and follow the instructions provided by the manufacturer. Begin by spraying the affected areas thoroughly, ensuring complete coverage. The foam will work to break down and loosen the mold, making it easier to remove. Allow the foam to sit for the recommended time, usually indicated on the product label. This dwell time allows the cleaning agents in the foam to effectively kill the mold and neutralize any odors.
After the dwell time has passed, use a brush or sponge to scrub the treated surfaces. The foam, combined with the mechanical scrubbing, helps to dislodge and remove the visible mold growth. Pay close attention to crevices, corners, and hard-to-reach areas where mold may be hiding. It’s important to be thorough in this step to remove all visible mold.
Step 4: Soak with a Mold Killer
In addition to using a foaming spray, applying a mold killer is essential in mold remediation. A mold killer is a chemical solution formulated to eliminate mold and prevent its regrowth. It is typically applied after the foaming spray has been used to clean the affected area.
To use a mold killer, carefully follow the instructions provided by the manufacturer. Apply the solution to the affected surfaces, ensuring complete coverage. Letting the mold killer soak in for the recommended amount of time is important. This allows the active ingredients to penetrate the materials and effectively kill any remaining mold spores or hyphae, which are the root-like structures of mold.
Soaking is crucial as it helps address mold growth at its source and prevent future regrowth. After the specified soaking time, thoroughly rinse the treated surfaces with clean water to remove any residue from the mold killer. This step ensures no harmful chemicals are left behind and provides a clean surface.
Step 3: Scrub Off Residue
After applying the foaming spray and mold killer, there may still be some mold residue remaining on the surfaces. To eliminate any remaining mold and thoroughly clean the area, scrubbing off the residue is necessary.
Using a brush or abrasive material, gently scrub the treated surfaces. The mechanical scrubbing helps dislodge and remove any remaining mold particles and residue. Pay close attention to areas where mold growth is particularly heavy or stubborn. Be thorough in scrubbing, but do not damage the surfaces or clean materials.
As you scrub, periodically rinse the brush or sponge to remove any loosened mold particles and prevent cross-contamination. After scrubbing, rinse the surfaces with clean water to remove residual cleaning agents or mold debris.
Step 4: Dispose of Everything
When dealing with mold in a crawl space, it is important to properly dispose of any contaminated materials that cannot be effectively cleaned or salvaged. This primarily includes items such as insulation, drywall, carpets, or any other porous materials that have been heavily affected by mold growth.
To dispose of these contaminated materials, it is recommended to seal them in sturdy plastic bags. This prevents the spread of mold spores during transportation and ensures that the mold-infested items are contained. The bags should be securely sealed to prevent any leakage or exposure to the surrounding environment.
Once the contaminated materials are bagged, they should be promptly removed from the crawl space and taken to an appropriate disposal facility. Following local regulations and guidelines for disposing of mold-contaminated materials is important. Contact local waste management or environmental agencies to determine the proper disposal methods and locations in your area.
What Causes Mold In A Crawl Space and How Do You Prevent It?
Mold growth in crawl spaces will only occur if certain conditions are met. Typically, as a fungi, it will need moisture, poor ventilation, and presence of organic matter.
Moisture
Excessive moisture is a primary factor contributing to mold growth in crawl spaces. Moisture can enter crawl spaces through various sources, such as water leaks from plumbing pipes or foundation cracks, flooding, condensation, or high humidity levels in the surrounding environment.
Crawl spaces are also particularly vulnerable to moisture buildup due to their proximity to the ground and enclosed nature.The dark and confined nature of crawl spaces can exacerbate the problem, as leaks or cracks may go unnoticed for an extended period, allowing mold to increase.
When moisture accumulates in a crawl space, it creates a damp and humid environment that provides the ideal conditions for mold to thrive. Mold spores, which are naturally present in the air, can settle and begin to grow on organic materials such as wood, insulation, or drywall. As mold colonies develop, they release spores into the air, which can spread throughout the crawl space and potentially affect the indoor air quality of the entire home.
Solution:
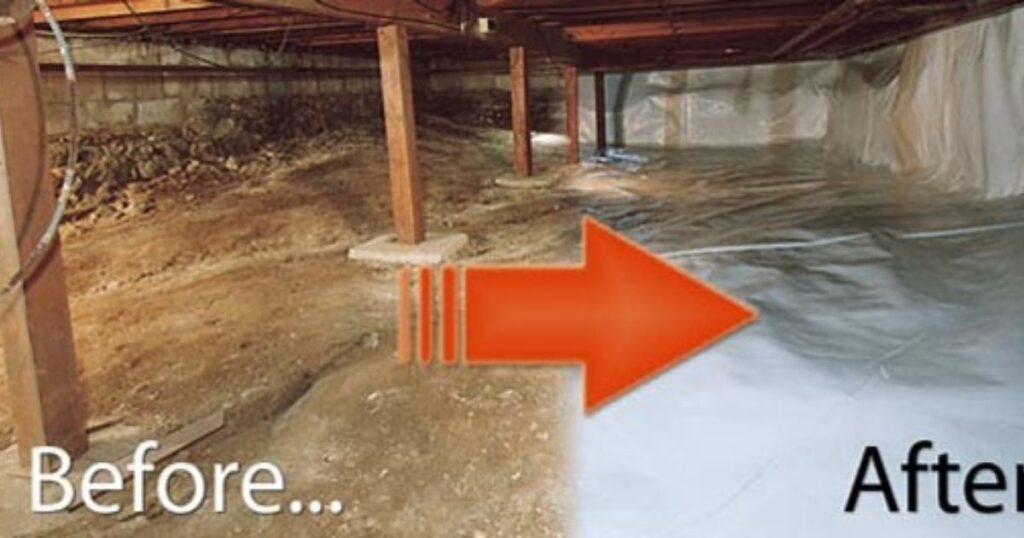
- Have a routine of checking the crawl space for leaks and humidity levels. You may also want to install a dehumidifier if you live in highly humid areas.
- Another option is to install a vapor barrier which will keep the moisture from the ground from getting into your crawl space.
Poor Ventilation
Inadequate ventilation in crawl spaces is another common factor that contributes to mold growth. Proper ventilation is essential for maintaining healthy air circulation.
Insufficient ventilation can result from various factors, such as sealed crawl spaces, lack of vents or vents that are blocked or improperly positioned, or a lack of air exchange between the crawl space and the outside environment.
When fresh air cannot enter and stale, moist air cannot escape, the crawl space becomes a stagnant environment that promotes mold growth.
Solution:
- Improve ventilation with vents in the walls and/or ceiling. Cross ventilation is ideal to flush out moist air.
- You may also install crawl space fans to maintain adequate air circulation and drainage around the exterior foundation walls.
Organic Matter
Mold requires a source of organic matter to grow, and crawl spaces often contain materials that provide an ample food source for mold. Organic matter commonly found in crawl spaces includes wood, insulation, cardboard, paper, and other building materials.
These materials can absorb and retain moisture, creating a favorable environment for mold to flourish. Mold spores, ubiquitous in the air, can settle on these organic surfaces and begin to grow if the conditions are right.
As mold colonies develop, they break down the organic matter, releasing enzymes that facilitate the growth and decay of the materials they inhabit. Therefore, organic matter in crawl spaces provides the necessary nutrients for mold to thrive and propagate.
Solution:
- Remove any existing organic debris that can serve as a food source for mold, such as wood, cardboard, paper, and decaying plant matter.
- Make it a habit of cleaning the crawl space regularly.
- Use plastic or concrete instead of wood to frame the crawl space when possible. These materials don’t degrade as easily.
Conclusion
Removing mold from crawl spaces requires a thorough assessment, appropriate personal protection, and proper cleaning techniques. Identifying and addressing the underlying causes of mold growth, such as moisture sources and poor ventilation, is important. Following the steps outlined above and taking the necessary precautions, you can effectively eliminate mold and prevent its recurrence in crawl spaces.